Skin Mapping: Keeping an Eye on Your Skin
Miiskin’s Skin Mapping is an automatic identification of moles and other marks on the skin using an app-based light version of total body photography and artificial intelligence.
It is a promising new solution to make it potentially more easy to visually look for new moles, freckles or any other marks on the skin.
It has the potential to help the millions of people who perform regular skin self-examinations to spot any changes in their skin that might be of concern.
Miiskin’s Skin Mapping Video Guide
Video walk-through:
- What is Miiskin’s Skin Mapping?
- How to more easily identify new spots on your skin with skin mapping.
- Why it’s important to regularly track changes in your skin.
What is Skin Mapping?
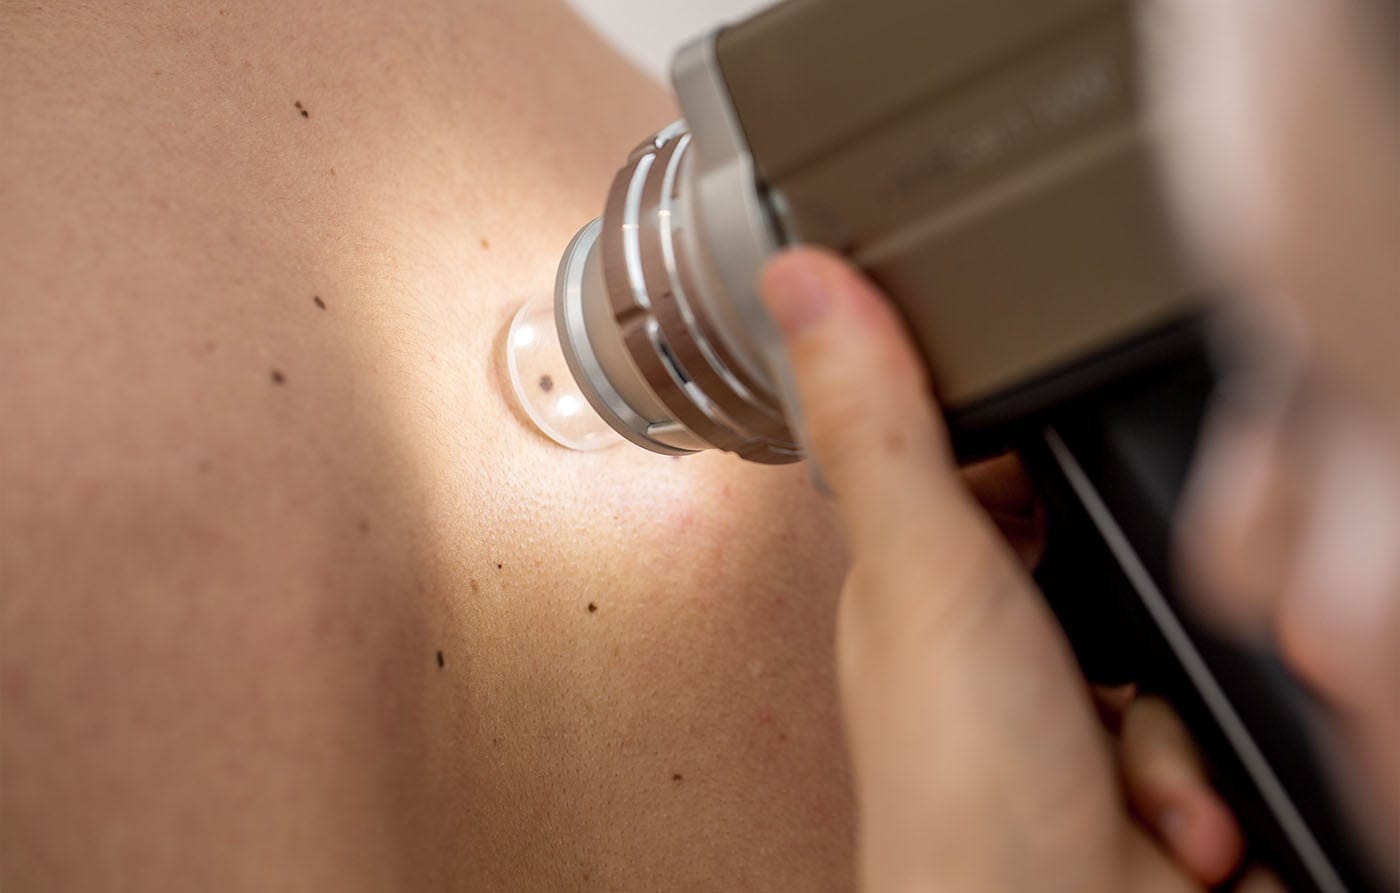
Skin mapping is related to mole mapping. Mole mapping traditionally focuses on tracking individual moles and marks on the skin for changes over time with high-resolution imagery.
Miiskin’s skin mapping helps you monitor if any new moles and other marks have appeared on the skin by using a light version of total body photography (four photos). Skin mapping is useful in conjunction with mole mapping to spot new moles and keep of track of any changes in existing moles.
Read on to learn why it’s important to look out for new marks on the skin.
Watching out for New Moles and Other Marks
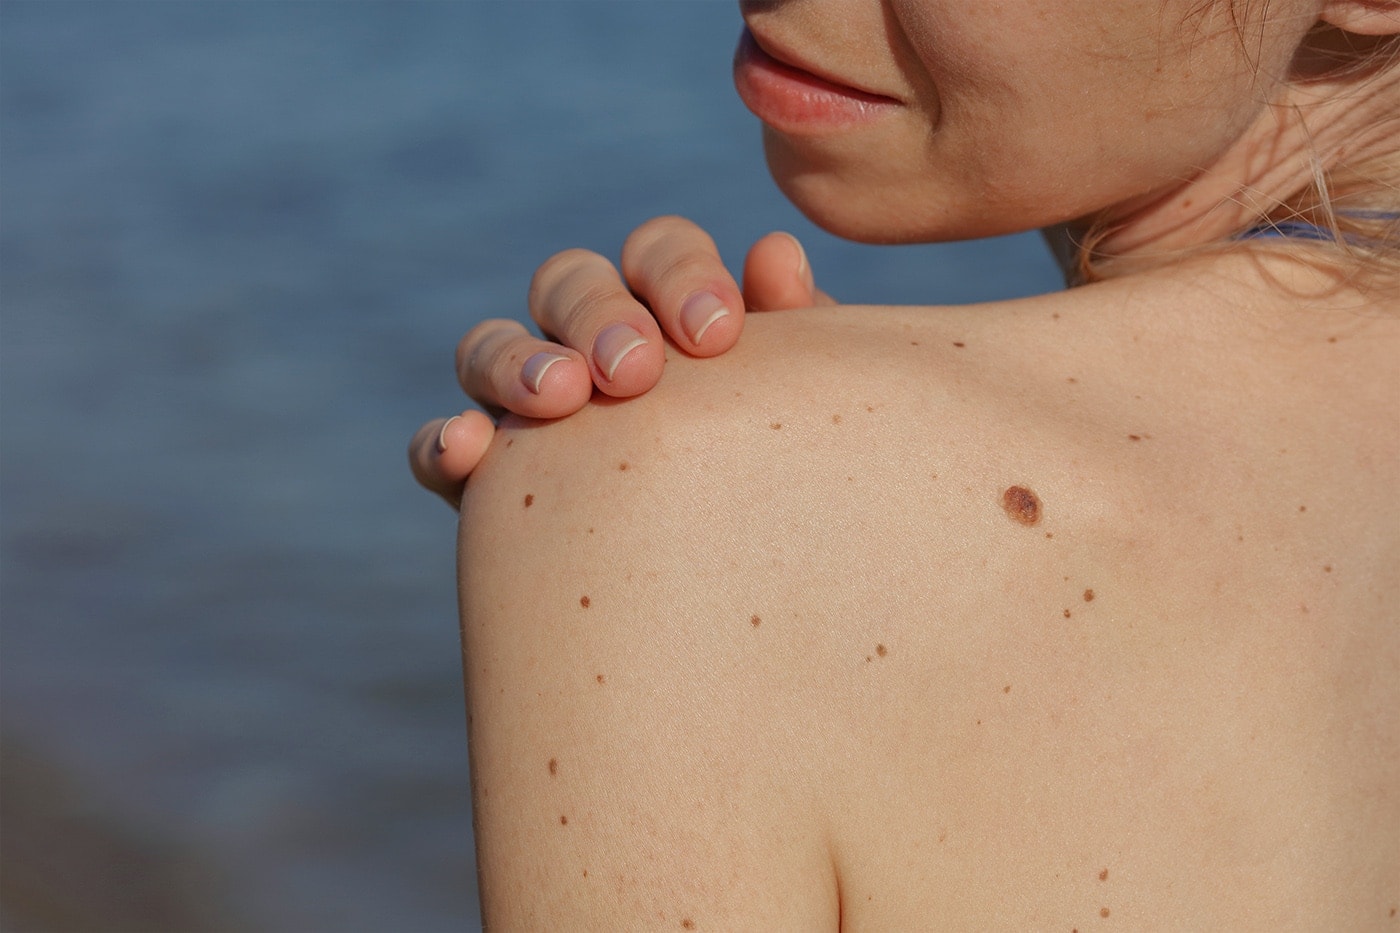
Skin cancer cases are on the rise. If you have had high exposure to the sun, have used UV tanning beds, or have a light skin complexion you have increased risk of developing skin cancer.
For all skin cancer types, early detection is vital for the best treatment outcomes. Many people try to pay close attention to the existing moles and other marks on their skin and understand the importance of visiting their doctor if they notice anything worrying.
However, scientific research has revealed that over 70% of melanomas start out as new marks on the skin rather than as changes to existing moles.
Skin Mapping and Total Body Photography to Identify New Moles and Other Marks on the Skin over Time
It can be difficult to keep track of all your moles and marks – especially if you have a high number of normal common moles or atypical moles. Some people may use a pen and paper to create a total body map of their moles but often they find it a time consuming and difficult process to follow over time.
Miiskin’s Skin Mapping, together with Total Body Photography, empowers you to keep track of skin changes in the comfort of your own home.
Try Skin Mapping with the Miiskin App
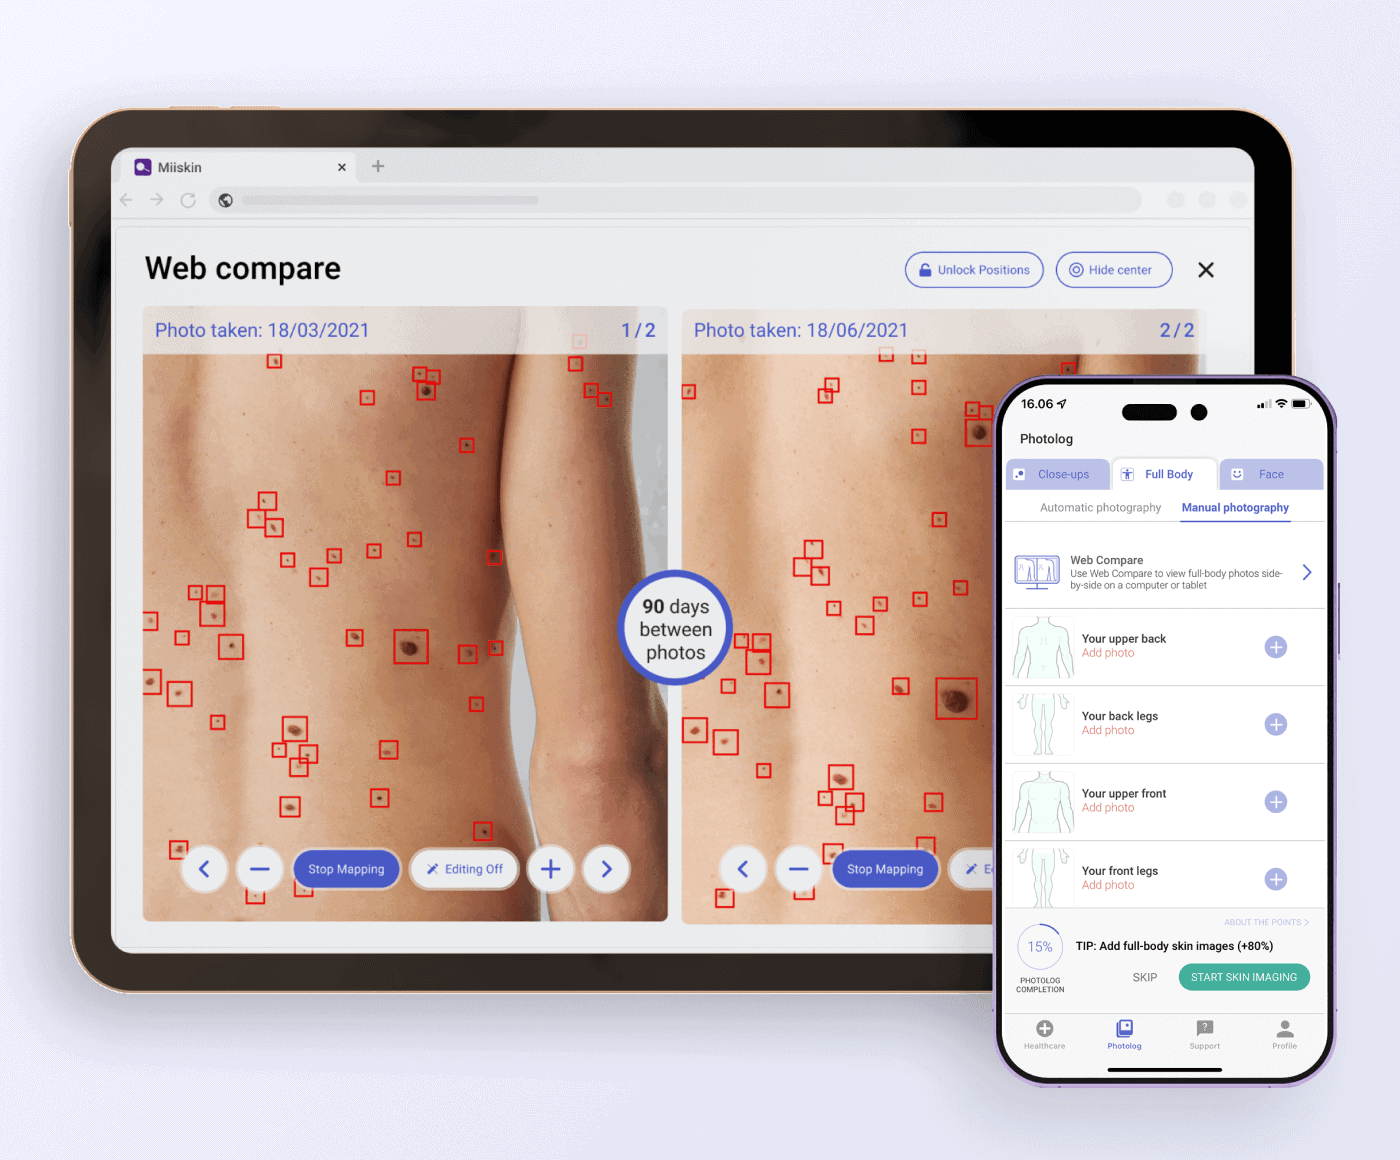
Skin Mapping lets you photograph the four largest areas of your skin. The computer then identifies and highlights the moles and marks that it can find on the skin. Subsequent photos can then be compared side by side by you with some of your moles and marks highlighted for visual support. Importantly, skin mapping does not take away the responsibility from you in looking at your skin for any visual changes.
Skin mapping may make it a lot easier to keep track of large skin areas. The back is a particularly tricky but important area to keep track of.
The Skin Mapping solution is currently available for photographs of the back and will soon be launched for the other three large areas of the skin as well.
Miiskin’s Skin Mapping solution is in beta and still developing, so if you start using it now, you will be able to have a say in how it should be improved and progressed in the future.
How Skin Mapping Works
Skin Mapping enables you to mark out any spot on your skin – conveniently assisted by automatic AI mapping. It is included in Miiskin Premium, which comes with a 30-day free trial.
1. Photograph Your Back
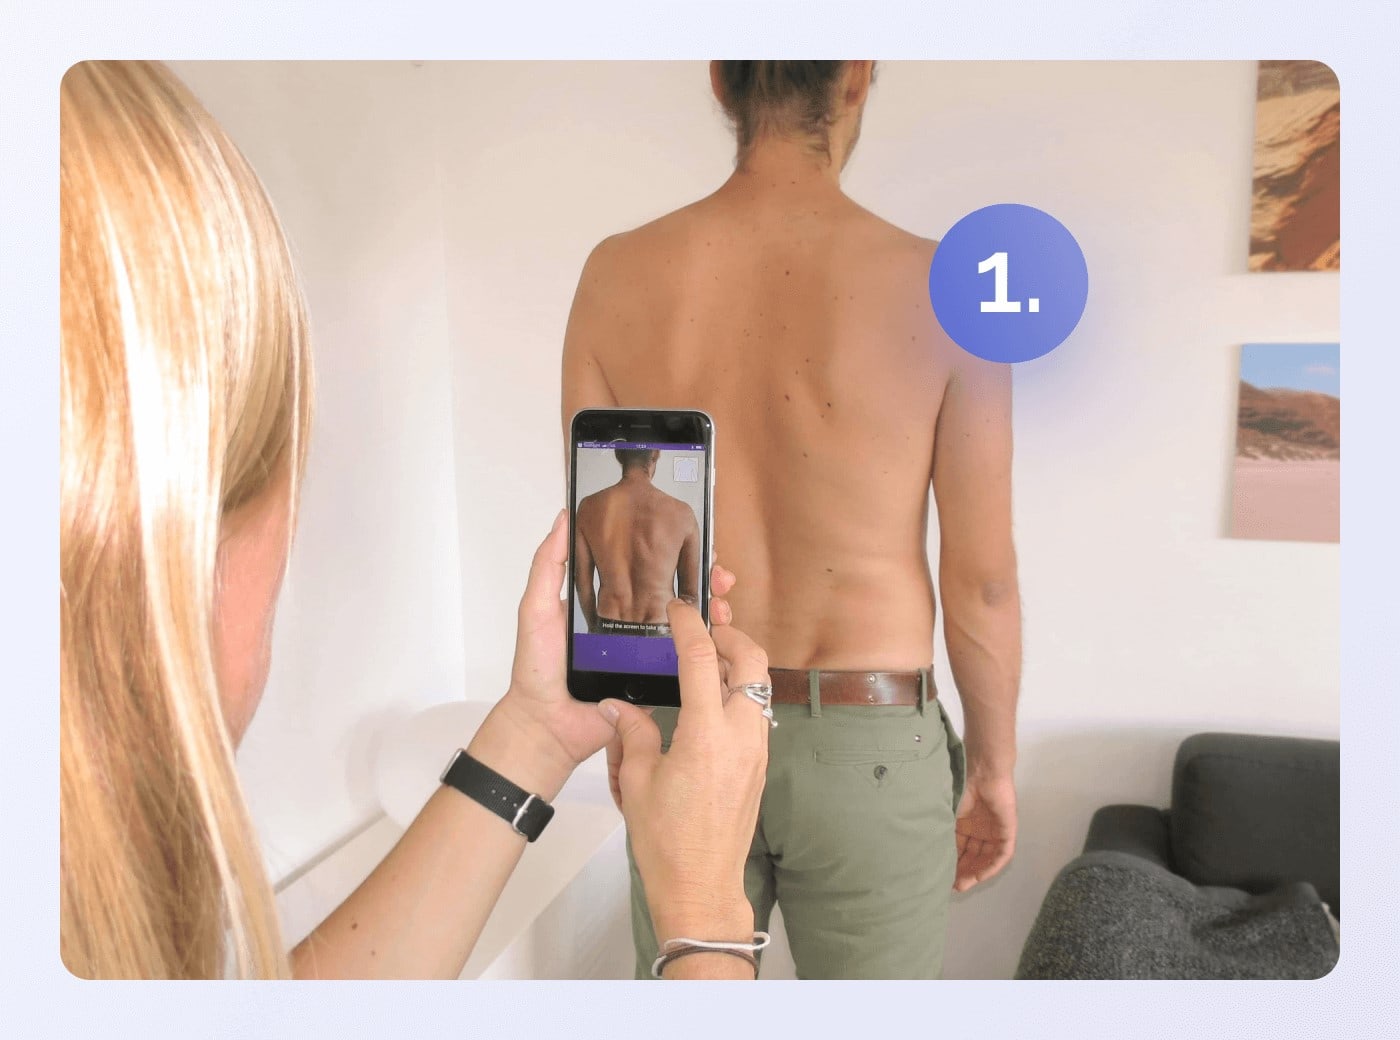
The AI-assistance is currently available for back photos. To try out Skin Mapping ask someone to photograph your back with the Miiskin app.
2-3. Request an Access Email to your email address
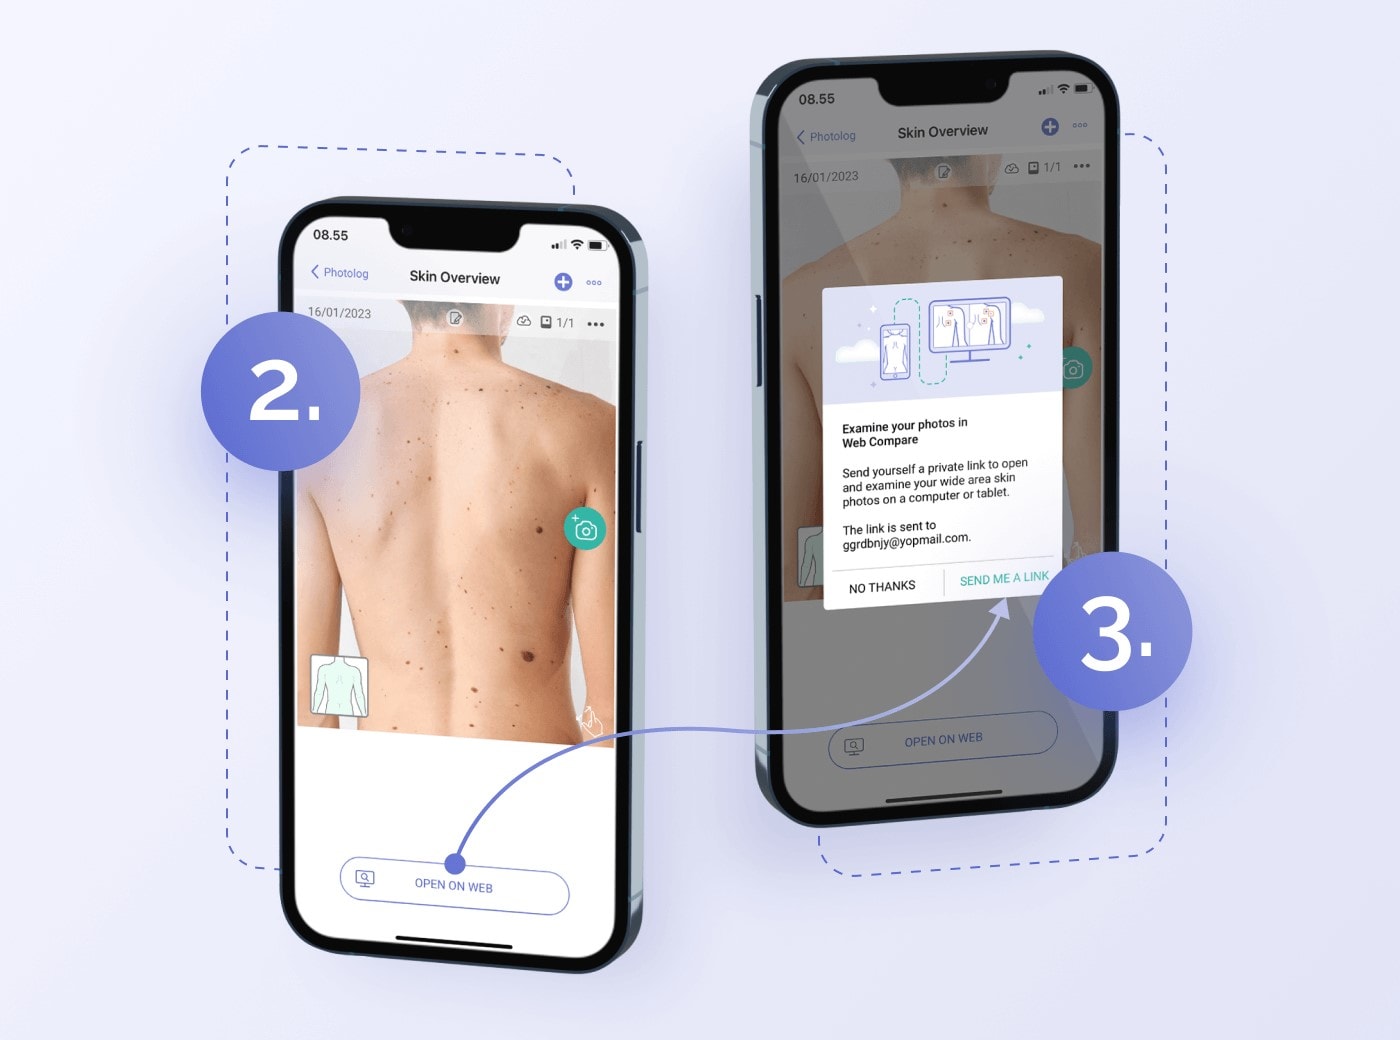
Next, use the app to request an access link emailed to your registered email address.
4. Open Skin Mapping and Web Compare
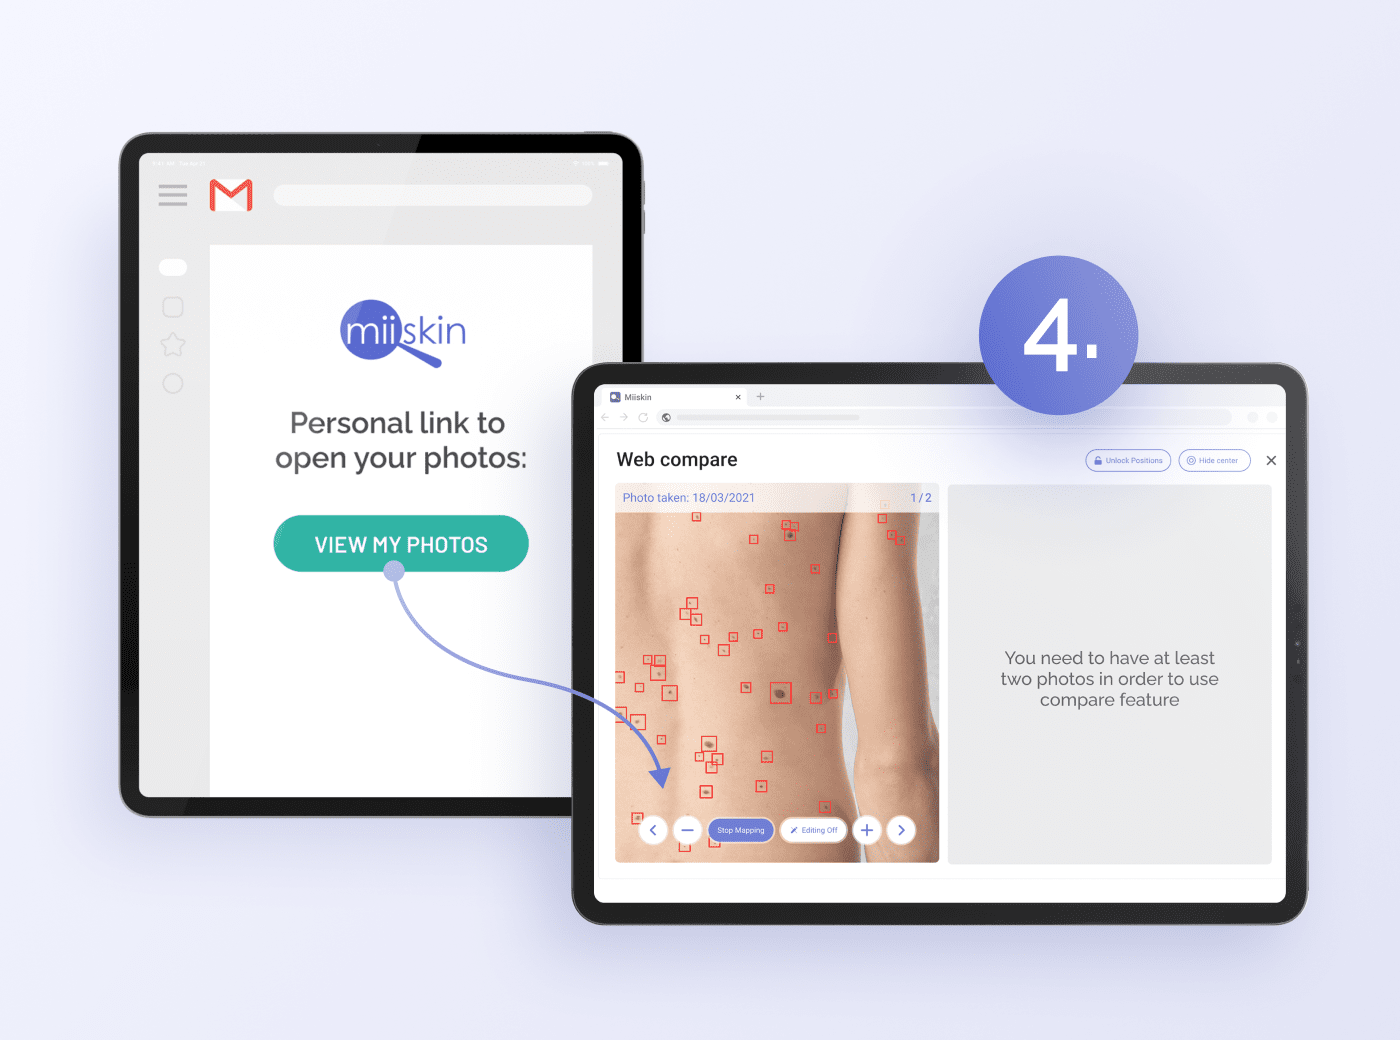
Open the email on your computer or tablet and press the link to open Web Compare.
5. View and Edit Your Skin Map
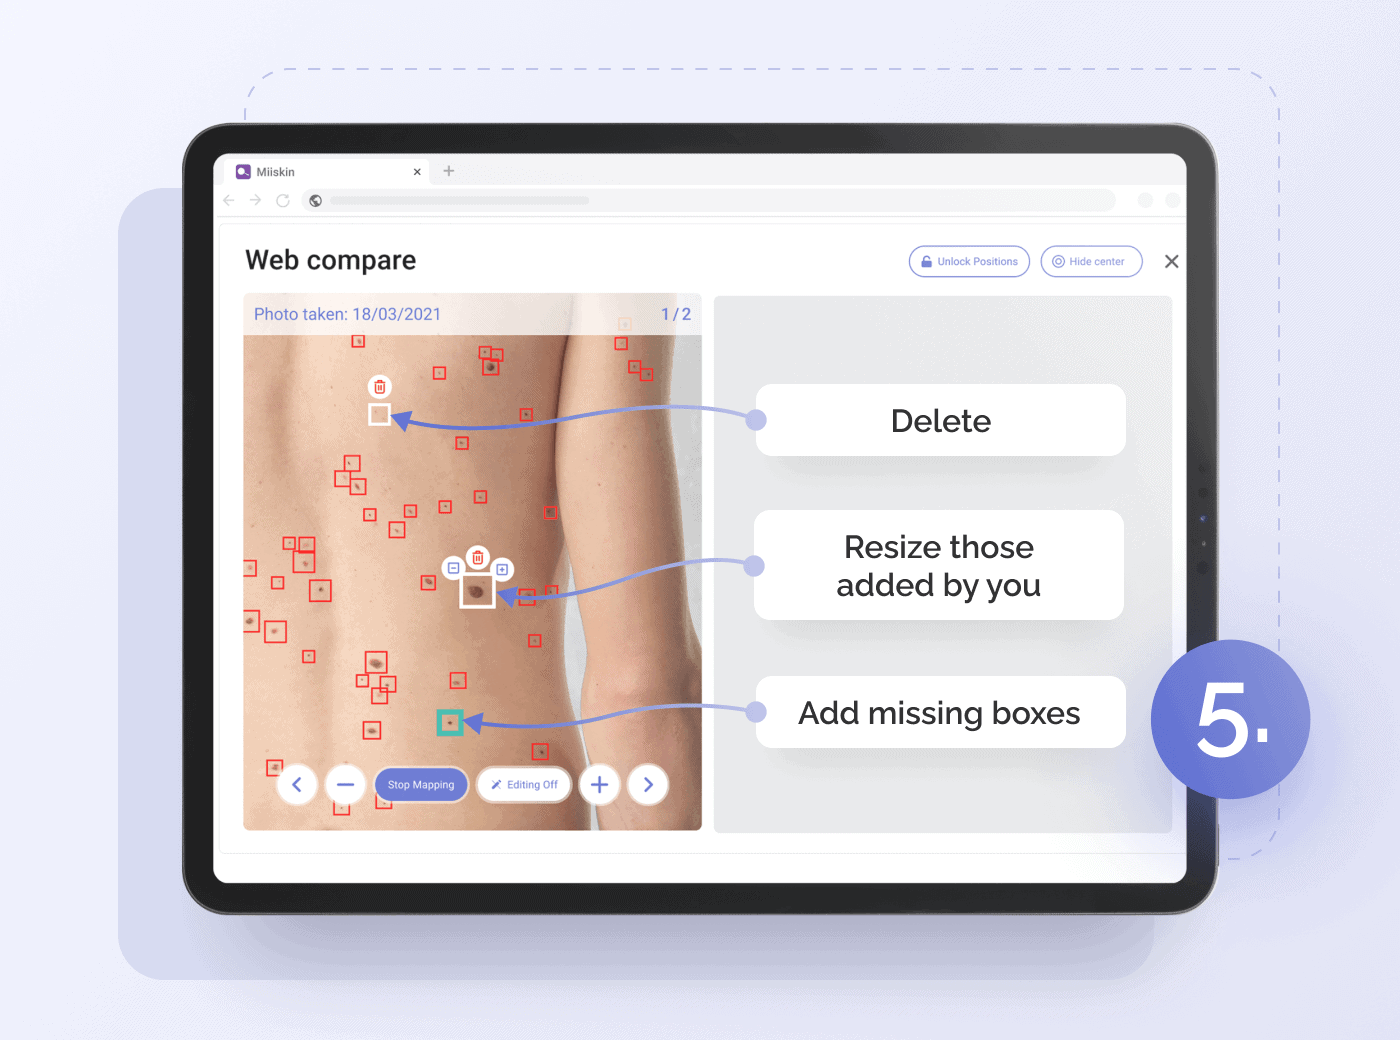
Now go through all the Skin Mapping boxes and remove any boxes that you think should not be there and add a box in any place where you think one is missing. This should help you get to know your skin better.
6. Compare Your Follow-Up Photos to the Baseline Photo
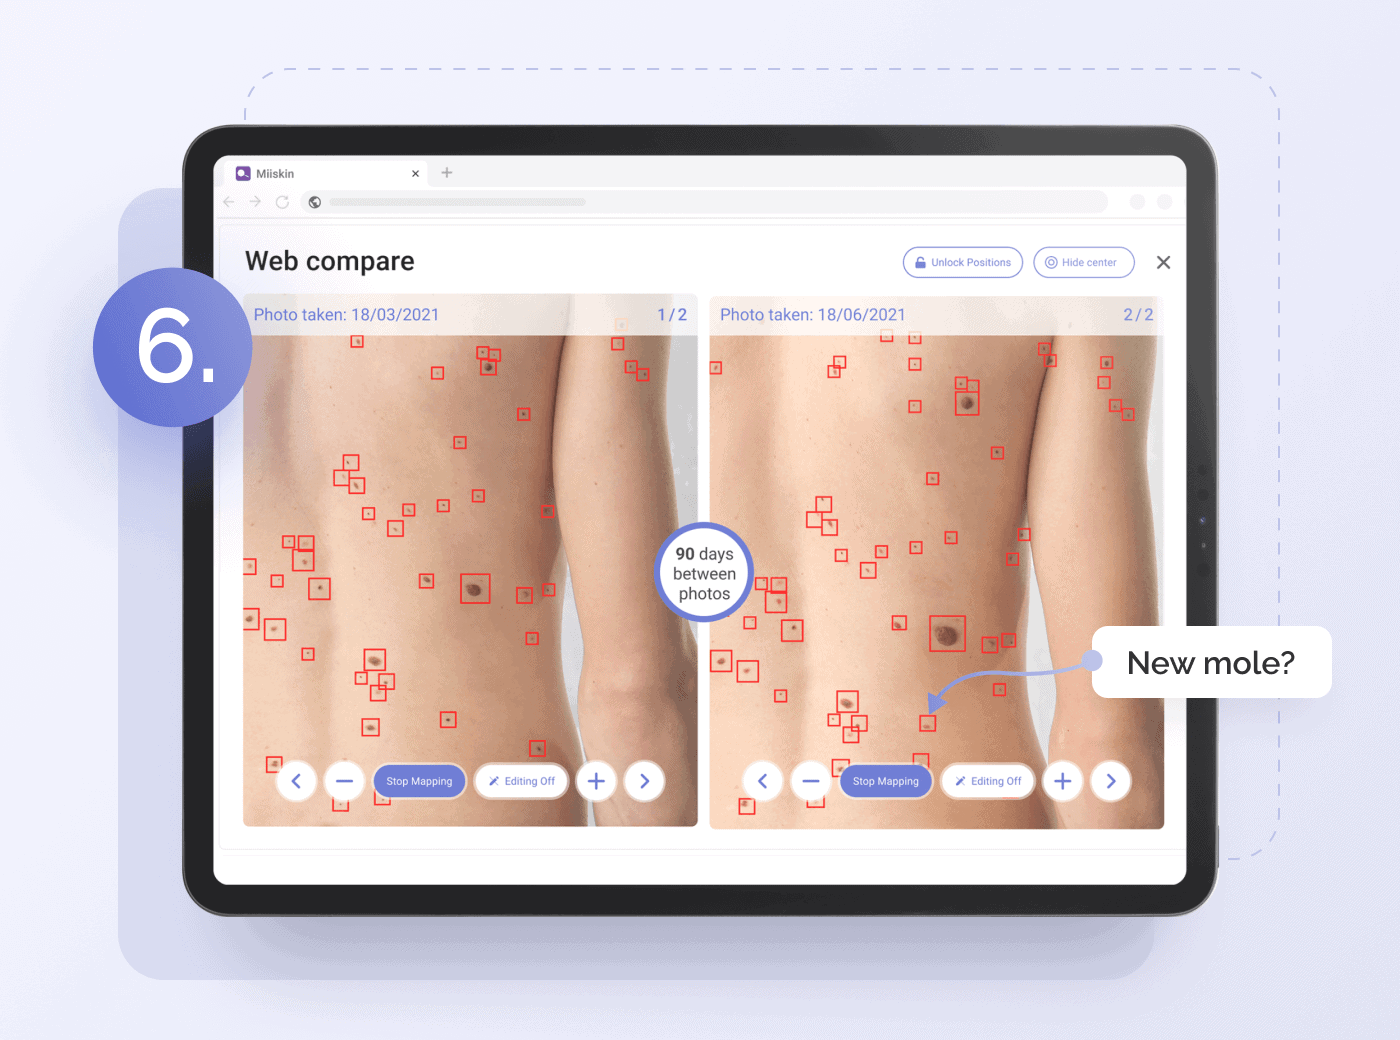
When you’ve taken a follow-up photo, usually after one to six months, it’s time to compare the two photos. Simply view and edit the skin map in the follow-up photo as you did with the baseline photo.
Remember the skin map is not meant to take away your responsibility of comparing the two photos for changes and if you are in doubt about a mole or mark on your skin, contact your doctor. But it should make the process more easy and convenient.
Read more
Guides
Frequently Asked Questions

